Cannabis consumption has become very popular in modern times, and one of the most beloved methods of consuming weed is through the use of bongs. Add that to the fact that people are naturally curious creatures who love to experiment, and you get a bunch of enthusiasts trying to make their own bongs. If you consider yourself part of this group, we have a DIY bong-making tutorial just for you to make the experimental process a little easier.
Making A Plastic Bottle Bong
Creating a bong out of a plastic bottle is one of the most common methods of making a DIY bong, as it is a simple and effective process. You will need the following to make a plastic bottle bong:
- Plastic bottle
- Water
- Knife or pen
- Lighter and foil (if you do not have a down stem)
Steps To Follow
- Fill your plastic bottle up to ¼ with water. This is necessary for your smoke to filter through when you are taking hits. Any size bottle will do, but it is important to keep in mind that the larger your bottle is, the bigger and more intense your hits will be.
- Poke a hole below the neck of the bottle to create a carb. This is the hole you will cover at first and then let go so that you can inhale the smoke within the bottle. Be sure to make the hole big enough to let air flow through it easily, but you should still be able to cover the hole with your finger. Make the hole with a knife or pen.
- Make a second hole above the waterline to create a down stem. You will put your down stem through this hole at an angle with its end submerged in the water. The hole should be the same width as a pen so that you can easily push the down stem through.
- Use a lighter to create your down stem. To make the down stem, empty the contents of the lighter with scissors or pliers until you are left with the hollow plastic tube. Tear off a piece of aluminium foil and wrap it around the wide end of the lighter tube. Press the centre down to create the bowl and poke small holes in it to let the smoke through.
- Press the down stem through the hole. Be sure to angle it downward, so the open end inside the bottle is submerged in the water. Once the down stem is in, make sure that your bowl is angled upward to hold your flower.
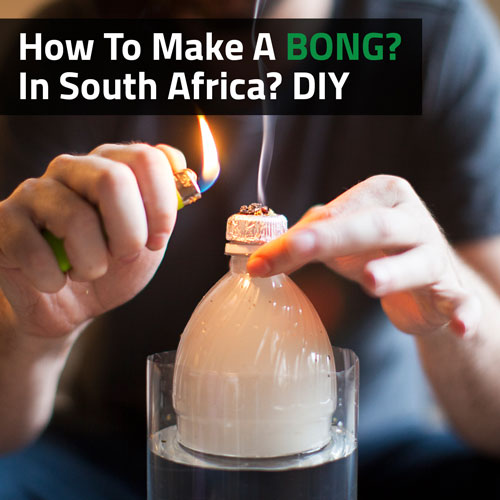
- Pack the bowl and try out your bong! Cover the carb with your finger, place your mouth on the mouthpiece, and light your bowl. Take a few slow pulls without inhaling fully. Once the bottle is filled with smoke, take your finger off the carb and inhale. If you cannot inhale all the smoke, cap the bottle and go ahead once you are ready.
-
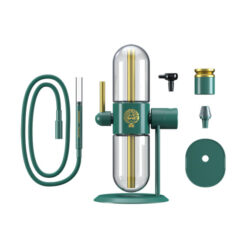
 Stundenglass Gravity Infuser – BlackR11,995.00
 -
 Dr. Greenthumb’s x Stundenglass Gravity InfuserR11,995.00
 -
 Cookies x Stundenglass Gravity InfuserR11,995.00
Making A Gravity Bong
If you are looking for a more in-depth crafting project, making a gravity bong is a good option. This method is a bit trickier, but the high is rewarding enough. You will need the following to make a gravity bong:
- Plastic bottle
- Foil
- Pencil or a toothpick
- Knife
- Scissors
- Plastic container (big enough for the bottle to fit in)
- Water
Steps To Follow
- Cover the plastic bottle’s mouthpiece with foil and shape it into a bowl. This is where you will pack your smoking substances before you use your DIY gravity bong. You can simply press the foil around with your finger until it has a suitable shape. Remember that your plastic bottle will have to fit within another plastic container for your gravity bong, so make sure that your bottle will fit.
- Poke small holes in the foil bowl for the smoke to travel through. Use a toothpick or sharpened pencil to poke in the right size. If the holes are too big, the contents of your bowl will fall through. If you cannot feel the smoke pulling through the foil, you can always add some more holes later.
- Cut off the bottom of the plastic bottle. You should cut off about 2.5 cm to 5 cm of plastic. This is necessary to allow water into the bottle later on once you have finished your gravity bong project. The easiest way to cut this part off is by making a slit in the plastic with your knife and then cutting around for a straight line. You do not have to be too precise with how much you cut off, but the more you remove, the less potent your bong rips will be.
- Fill the separate plastic container with water. A plastic bucket or bin will work best. You can even cut a bigger plastic bottle’s top part off to form a container, as long as your bong bottle fits in it. Leave about 2.5 cm to 5 cm of the container unfilled so that water does not overflow.
- Press your plastic bottle down into your water-filled container. Stop pressing down once the waterline reaches the neck of the bottle to prevent the bowl from getting wet. Your plastic bottle should be filled with water. If you are using a shallow container that does not allow your bottle to fill, your bong rips will be smaller.
- Load up your bowl and try out your new DIY gravity bong! Start by lighting the contents of your bowl and lift the plastic bottle slowly to let it fill with air. Keep lifting the bottle until it is nearly out of the water. Remove your foil bowl and place your mouth on the bottle’s mouthpiece to inhale the smoke. Be sure to keep the bottle steady as you inhale, if you press it back down into the water, you will lose a lot of smoke. If you cannot inhale all the smoke at once, you can simply cover the mouthpiece with your hand until you are ready for another hit.
Experimenting and playing around with your own creations is fun, but a DIY bong simply cannot beat the real deal. Check out Cannarite’s wide selection of bongs, dab rigs, and accessories to make your cannabis experience as enjoyable as possible. You can also customise your experience by checking out compatible products, giving you the freedom to still create your own unique bong setup.


