Whether you are new to vaping or upgrading to a more advanced setup, one term you will frequently encounter is “priming the coil.” While it might sound technical, priming a coil is a simple, essential process that helps protect your device, ensures a smooth vaping experience, and prolongs the life of your coils.
Failing to prime a coil correctly can lead to a burnt taste, wasted e-liquid, and shortened coil lifespan. In this Vaping 101 guide, we will break down what coil priming is, why it matters, how to do it correctly, and how different devices may require slight variations in technique. Let us get into the heart of proper vaping maintenance with the crucial topic of coil priming.
What Does It Mean To Prime A Vape Coil?
Priming a vape coil refers to the act of manually saturating the coil’s wick (typically cotton) with e-liquid before using it. This step allows the wick to absorb enough liquid to avoid dry burning when power is applied.
Vape coils work by using a heating element (usually a metallic wire or mesh) wrapped around or embedded within a cotton wick. When you press the fire button on your vape, the heating element gets hot and vaporises the e-liquid that’s been absorbed by the cotton.
However, if the cotton is dry, the heat burns it directly, resulting in an unpleasant burnt taste, called a dry hit, and often damages the coil irreversibly.
Why Is Priming A Coil So Important?
- Prevents burnt hits: A dry wick scorches almost immediately under heat. Once burned, the cotton imparts a permanent burnt flavour – even if it is later saturated. Proper priming ensures the wick is soaked and safe for use.
- Extends coil life: When coils are properly primed, they do not endure unnecessary thermal stress. This helps maintain their structural integrity and extends how long they last.
- Improves flavour performance: A saturated wick delivers strong flavours as intended by the e-liquid manufacturer. Skipping priming can cause weak flavour output or an off taste even if you avoid burning it.
- Saves e-liquid: Dry hits are wasteful. You will need to toss burnt coils and wasted e-liquid if the flavour is compromised. Priming helps you avoid these mishaps from the start.
When Should You Prime A Coil?
You should prime a coil every time you install a new one, whether it is in a:
- Clearomizer or tank
- Pod system with replaceable coils
- Sub-ohm tank
- Rebuildable atomizer with new wicking
You do not need to re-prime a coil after every refill unless you have let the tank sit unused for a long period (which could dry the wick). However, any time the wick is dry or freshly installed, priming is necessary.
Step-By-Step Guide: How To Prime A Coil Properly
Let us walk through the general process of priming a coil, applicable to most clearomizers and tanks with replaceable coils.
1. Install The New Coil
Unscrew your tank and carefully remove the old coil. Screw in the new coil securely into the base of your tank. Be cautious not to overtighten – it should be firm but not forced.
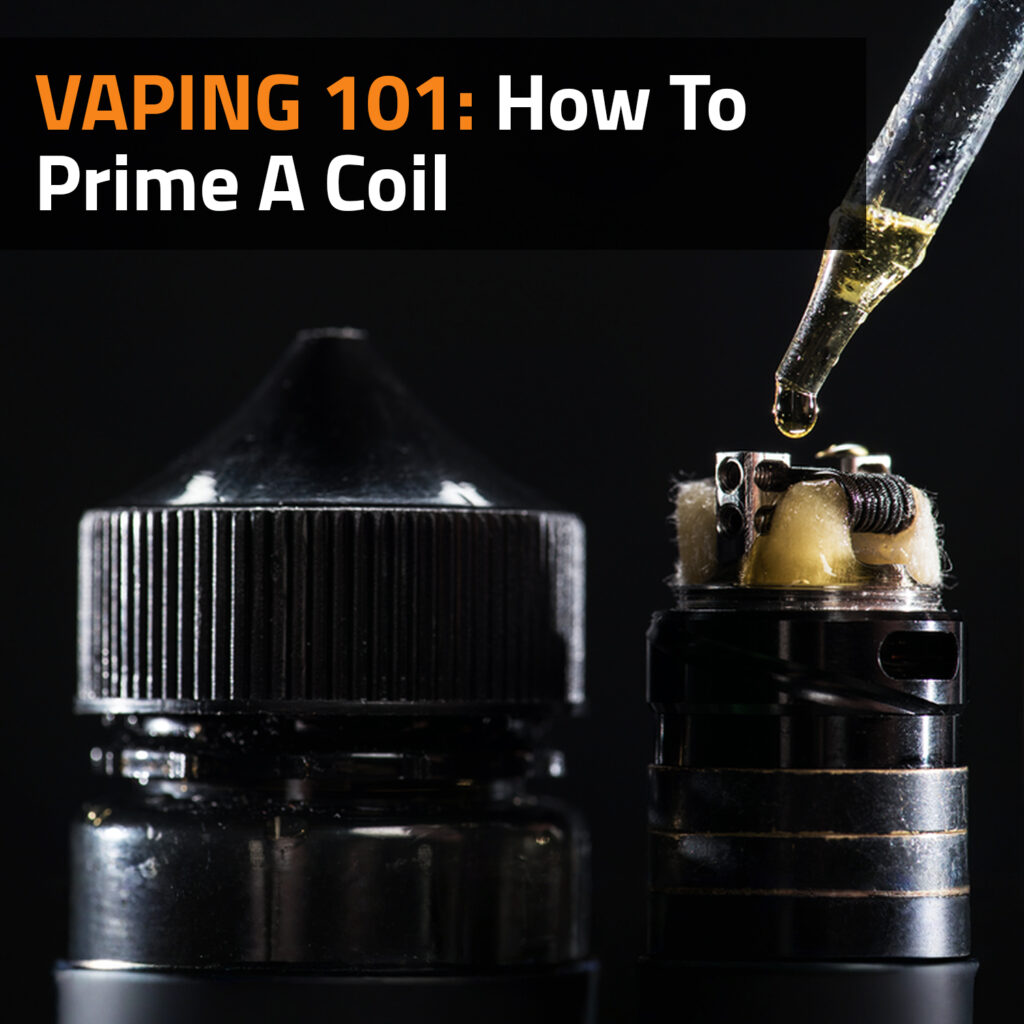
2. Drip E-Liquid Directly Onto The Cotton
Look for exposed cotton on the coil – usually in small holes or slots on the coil’s sides, and sometimes on the top. Using the nozzle of your e-liquid bottle:
- Add 2–3 drops of e-liquid onto each visible cotton port.
- If the coil is open at the top, drop 1–2 drops directly down the center to saturate the internal cotton.
You do not want the cotton to be flooded or dripping excessively, just damp and saturated.
3. Fill The Tank With E-Liquid
Assemble your tank and fill it according to its design (top-fill or bottom-fill). Make sure to avoid pouring e-liquid into the central chimney or airflow tube.
4. Let The Coil Sit (“Soak”)
Even after manually dripping e-liquid, give the coil time to soak further from the tank’s reservoir. The typical wait time is about 5 to 10 minutes. This ensures the wick is fully saturated and ready for use.
5. Take A Few Dry Puffs (Optional)
Without pressing the fire button, take a few gentle puffs on the mouthpiece. This draws e-liquid into the coil’s wick through airflow suction and further aids priming.
Warning: Do not overdo this step, or you risk flooding the coil.
6. Start At A Low Wattage
Once you are ready to vape, set your device to the lower end of the recommended wattage range for your coil. Take a few puffs at low power and slowly increase the wattage to your preferred level. This “breaks in” the coil gently and improves longevity.
How To Prime Coils In Different Types Of Devices
Priming your coil may look different depending on the type of device you are using.
Pod Systems With Replaceable Coils
Pod vapes with replaceable coils often follow the same rules:
- Prime visible cotton areas on the coil.
- Let the pod sit after filling.
Some pods do not allow access to the coil wick directly; in this case, soaking time becomes more crucial.
All-In-One (AIO) Devices
AIO vapes that use coil heads typically allow top or bottom coil insertion. Follow the same priming method by dripping e-liquid onto exposed cotton and letting it sit.
Sub-Ohm Tanks
Sub-ohm coils are larger and absorb more liquid. Be generous when dripping e-liquid into all cotton areas and allow a longer soak time (10–15 minutes). Start at low wattage before ramping up.
Rebuildable Atomizers (RDAs & RTAs)
With rebuildable coils, you manually insert and wick your cotton. Priming involves:
- Saturating the wick after installation
- Letting it soak into the coil wrap
- Test-firing at low wattage to watch vaporisation and ensure no burning
How Long Should A Primed Coil Last?
Coil lifespan depends on several factors:
- E-liquid composition (sweet or high-VG liquids gunk up faster)
- Wattage settings
- Frequency of use
- Proper priming and maintenance
On average, a properly primed coil lasts:
- 7–14 days for standard coils
- 5–10 days for sub-ohm coils
- 1–2 weeks or more for mesh coils, which offer even heating and longer life
If you notice diminished flavour, burnt taste, or reduced vapour, it is time to change the coil.
Troubleshooting Coil Problems
If you primed your coil but still face issues, consider the following:
- Still getting dry hits? Your e-liquid may be too thick for your coil’s wick. Try a higher PG liquid or reduce wattage.
- Leaking? You may have over-primed, or your tank is overfilled. Empty some e-liquid and clean the airflow.
- Gurgling or spitback? Excess e-liquid may have flooded the coil leading to e-liquid spitback. Remove and gently blow through the mouthpiece (not into the battery) to clear out the excess.
Priming a coil may seem like a small step, but it is one of the most vital habits you can build as a vaper. By taking a few minutes to manually saturate your wick, you protect your device, save money on coils, and get the best flavour and vapour your setup can offer.
Whether you are using a pod system, sub-ohm tank, or rebuildable atomizer, proper coil priming ensures your vape performs the way it was designed to.
So, the next time you change a coil, do not rush it – prime it right and vape happy.