Embrace the world of DIY vape juice, where you become both the creator and consumer. This is your chance to concoct a personalised version of the retail e-liquid using the same base ingredients, but with boundless room for creativity and individualisation. DIY e-liquid presents an inventive and economical solution in the face of the uncertain vaping landscape that has unfolded over recent years.
-
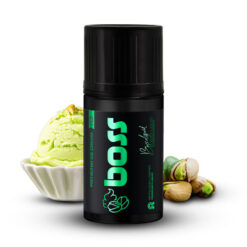
Boss E-Liquids – Pistachio Ice Cream
R260.00 -
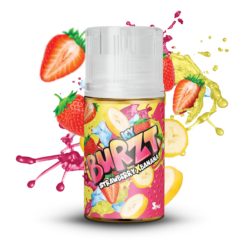
BURZT – Strawberry Banana
R260.00 -
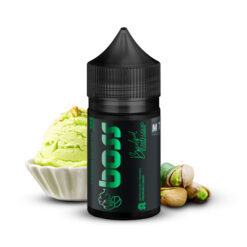
Boss MTL – Pistachio Ice Cream
R200.00 -
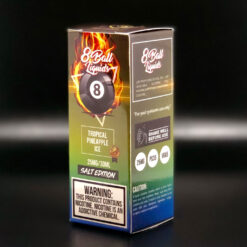
8 Ball Liquids Saltnic – Tropical Pineapple Ice
R350.00
While budget-friendly e-liquid options exist within the market, the ever-looming prospect of flavour bans raises a crucial question: will access to your preferred vape juice remain viable months from now? Within this guide, you’ll find a comprehensive roadmap and essential insights on crafting your own vape juice. We’ll delve into the necessary supplies and ingredients, explore diverse mixing techniques, introduce vape calculators, explain the concept of steeping, and much more.
Creating Vape Juice Made Easy
Breaking it down to the basics, crafting your own e-liquid involves a straightforward process of blending key components that constitute e-juice: a base liquid of PG and VG, nicotine, and flavour concentrates. Not every element is mandatory – if you desire nicotine-free or unflavoured e-liquid, you can omit certain ingredients.
Though it might seem daunting, it’s far more manageable than you might anticipate. You don’t require an advanced understanding of chemistry; if you can mix a cocktail, you’re equipped to fashion your own vape juice.
For a simplified approach to crafting vape juice, consider the following steps:
- Explore an online DIY vape shop (such as Ecigexpress, Wizardlabs, etc.)
- Acquire VG and PG, or opt for pre-made base liquid; secure a minimum of 100 ml of each
- Add a couple of 50 ml plastic bottles and a few plastic pipettes to your cart
- Browse the assortment of DIY vape juice flavourings and select those that pique your interest
- Upon receiving your package, use the pipettes to drop around 10-20 flavouring drops into an empty bottle
- Fill the bottle halfway with PG and top it off with VG
- Shake the mixture and let it rest for several hours to allow air bubbles to settle
- Taste your vape juice and adjust according to your preference
Congratulations, you now possess 50 ml of self-made vape juice! Admittedly, this method is more of a DIY shortcut and may not yield anything exceptional. Nevertheless, it’s your personal creation.
If your aspirations include incorporating nicotine and exploring more intricate blends, this straightforward DIY initiation shouldn’t be followed. Never approximate measurements when dealing with nicotine. While this approach lacks precision, it doesn’t require the same level of precision since nicotine isn’t involved.
Approaches For Blending DIY E-Juice: Weight Vs. Volume
When it comes to crafting DIY e-juice, there exist two distinct methods for mixing, each accompanied by its own array of advantages and drawbacks.
- Weight-Based Mixing: With this technique, a scale is employed to meticulously introduce each ingredient to the blend, considering their respective specific gravities. To simplify, a millilitre of VG holds more weight compared to a millilitre of PG or flavouring. While the science behind this might seem complex, your main focus should be on utilising a vape juice calculator that takes these variations into account, leaving the mathematical computations to it.
- Volume-Based Mixing: This approach entails gauging the volume of each ingredient using an array of syringes (preferably one for each component). It’s the most beginner-friendly method, since liquids are typically measured in this manner. However, it does compromise accuracy and demands more supplies and cleaning. Even when using the volume-based technique, calculators remain indispensable. They not only translate percentages into millilitres but also furnish you with the precise quantity of nicotine base required to attain your desired potency. As a crucial note, refrain from approximating nicotine measurements during e-juice concoction!
Essential Components For Crafting Your Own Vape Juice
Irrespective of the method you choose to follow for your e-liquid creation, along with your desired vape preferences, certain indispensable ingredients and DIY supplies are required. Here’s a comprehensive checklist to guide you:
- Base liquid: Essentially composed of vegetable glycerin (VG) and propylene glycol (PG), these two components form the foundation of e-juice. Your base liquid serves as the unflavoured, zero-nicotine e-juice. While pre-mixed ratios like 50/50 or 70/30 are available, opting for flexibility in your juice’s final ratio suggests purchasing a litre of VG and 500 mL of PG. Ensure both are of USP grade to ensure cleanliness for e-juice mixing.
- Vape juice flavour concentrates: These play a pivotal role in determining your e-juice flavour profile. Opt for concentrates specially designed for vape juice, avoiding substances like essential oils and any other form of oil. Brands matter, as each flavouring has distinctive notes and potency. For beginners, consider starting with highly-rated recipes and purchasing the associated concentrates.
- Nicotine: This ingredient is optional, based on your nicotine preference and comfort with handling. A 100 ml bottle of 36 or 48 mg/ml nicotine generally suffices for beginners. Nicotine is typically suspended in a PG solution, although various ratios are available. Be cautious when dealing with and storing nicotine – while its toxicity is often exaggerated, it’s essential to prevent contact with skin and face. Always use gloves and store nicotine bottles out of children’s reach.
- Storage bottles: Employ individual squeeze bottles with nozzle tips to house your base liquid, ensuring convenient incorporation into your homemade blends. Opt for a couple of 100 ml condiment bottles. If you’re using nicotine, store it in amber or cobalt glass bottles – these coloured, solid glass containers slow down degradation.
- Labels: Invest in affordable adhesive labels for writing crucial details before affixing them to the bottles.
- Gloves: Keep a supply of disposable gloves on hand for essential protection. These are easily obtainable from local pharmacies.
Ingredients To Steer Clear Of
There’s a compilation of ingredients that often raise questions regarding their suitability for vape juice, but unequivocally, they should be avoided:
- Unconventional flavourings: Any flavouring not commonly utilised in DIY vape juice production should be avoided due to potential risks.
- Essential oils and oils: This category is firmly off-limits due to its inherent danger to vaping health and equipment.
- Household items: Despite seeming appealing, any household item should not be incorporated into vape juice; it’s a misguided notion.
- High-strength nicotine: Utilising very high-strength nicotine is inadvisable unless you have the proper lab environment and expertise.
Two ingredients that have incited debates within the DIY community are distilled water and vodka. Although once used to dilute e-liquid, their efficacy has greatly diminished with current vape gear. We strongly recommend restricting your base e-liquid composition to VG and PG, steering clear of any alternatives.
Exploring DIY Vape Juice Kits
For those inclined to secure all their DIY essentials in a comprehensive package, a range of kits is readily available. These kits, primarily designed for beginners, encompass all the necessary components to kickstart your DIY journey.
A significant majority of DIY kits are tailored for volume-based mixing and typically incorporate an array of syringes alongside the vital e-liquid ingredients. If you’re uncertain between weight and volume methods, investing in a starter kit and a scale is a prudent approach. This allows you to experiment with both techniques and determine which aligns better with your preferences. Even if you’ve already settled on weight-based mixing, procuring a DIY starter kit can prove beneficial, as you’ll likely find utility in all the items included over time.
E-Juice Calculators: An Indispensable Resource
To achieve accuracy and consistent outcomes in your mixing endeavours, a vape juice calculator is indispensable. This tool simplifies the entire process by furnishing essential information. Whether you require the precise nicotine quantity to reach your preferred strength or the ingredient proportions for crafting a delightful 70/30 e-juice blend, a calculator is your trusted guide. While it might initially sound daunting, mastering its usage is remarkably straightforward.
An array of calculators are available, spanning web-based options to mobile and desktop applications. Among the user-friendly and widely favoured choices is the web-based calculator provided by E-liquid-recipes.com (ELR). This calculator proves exceptionally intuitive with practice and boasts an extensive recipe database, along with a forum for discussing and seeking DIY insights.
In the event that you prefer an alternative to web-based calculators, consider these two options:
- e-Juice Me Up (Desktop): This user-friendly offline desktop calculator allows you to save recipes locally. For weight-based mixing, ensure you click on “Tools” and then “Grams Set.” To expedite the process, employing ELR’s default values is advisable:
- PG: 1.036 g/ml
- VG: 1.261 g/ml
- Flavouring: 1.000 g/ml
- Nicotine: 1.036 g/ml (if PG-based), 1.261 g/ml (if VG-based)
- Vape Tool (Android): A beginner-friendly app encompassing all things vaping. Navigate to the “E-liquid Blender” section for a self-explanatory experience. It’s worth noting that this app extends its utility to coil wrapping via the “Coil Calculator” section. Notably, Vape Tool holds a long-standing presence on the Play Store and offers lasting value to vapers.
After Mixing: What To Do Once Your E-Juice Is Created
- Labelling: Immediately label your blends with essential details: VG/PG ratio, nicotine potency, flavour percentages, and the date of creation. This step is crucial. Surprisingly, many newcomers overlook this, only to encounter frustration when attempting to replicate a perfect concoction without documentation. Preserve your recipes by recording them in a notebook, spreadsheet, or on platforms like e-liquid-recipes.com.
- Steeping: Steeping, a concept that often bewilders DIY e-juice novices, holds significance. E-juice comprising multiple concentrates requires a specific period for flavours to harmonise and settle. This duration varies for each blend. More intricate dessert or cream-based mixes could take up to four weeks to reach their prime, while simpler fruit-based recipes might require minimal or no steeping.
- Testing: Following the steeping phase, it’s time for testing. Employ a high-quality dripper or rebuildable atomizer rather than a tank for optimal results. This approach offers a more accurate assessment of your juice’s flavour profile, safeguards your coils from unsuccessful experiments, and facilitates quicker sampling of different juices.
- Storage: Safeguard your homemade juice by storing it in a cool, dim environment. Sunlight, heat, and oxygen can detrimentally affect e-juice quality. Additionally, ensure your creations are securely out of reach of both pets and children.
In conclusion, venturing into the realm of creating your own vape juice is a rewarding journey that grants you unprecedented control over your vaping experience. Armed with the essential knowledge of ingredients, mixing techniques, and the importance of precision, you can craft unique blends tailored to your preferences. From understanding the nuances of base liquids and flavour concentrates to mastering the intricacies of steeping and testing, your DIY e-juice endeavours offer both creativity and autonomy. Remember to prioritise safety, accuracy, and the preservation of quality as you embark on this exciting odyssey of self-made vaping satisfaction.


