Crafting your own e-liquid at home offers an exciting way to personalise your vaping experience, save money in the long run, and explore creative flavour combinations you will not be able to find anywhere else. While the thought of mixing e-liquids might seem intimidating at first, the process is surprisingly straightforward once you understand the basics.
DIY e-liquids allow you to control every element of the mixture, from nicotine strength and flavour intensity to the perfect balance of base liquids, including propylene glycol (PG) and vegetable glycerin (VG). This guide is designed for those who are eager to understand more about the world of DIY e-liquids, providing an overview of the essential tools, ingredients, and techniques to get started safely and successfully.
Why Should I Make My Own E-Liquid?
There are several reasons why vapers choose to craft their own e-liquids, some of which include:
- Customisation: With DIY e-liquids, you are not limited to the flavours or nicotine strengths available in stores. Instead, you can experiment with unique combinations tailored to your taste.
- Saving money: While the initial investment in e-liquid ingredients and DIY tools may seem steep, creating your own e-liquid is significantly cheaper in the long run.
- Control over ingredients: By making your own e-liquids, you can ensure that you are using high-quality and safe ingredients while avoiding additives or components you would prefer to exclude.
- Sustainability: By making your own e-liquid, you are aiding in reducing waste as you can reuse bottles and purchase ingredients in bulk.
Making DIY E-Liquids: Getting Started
Before you can get started on mixing your first batch of e-liquid, you will need to gather some essential supplies and ingredients.
Essential Ingredients
- Propylene Glycol (PG): A thinner liquid that enhances throat hits and carries flavour well.
- Vegetable Glycerin (VG): A thicker liquid that produces dense vapour clouds and a smoother inhale.
- Nicotine (optional): Available in various strengths, nicotine can be added depending on your preference. Ensure that you purchase nicotine specifically designed for vaping and handle it with care.
- Flavour concentrates: These come in countless varieties, from single-note flavours to complex blends. Make sure to choose food-grade concentrates specifically made for vaping.
Essential Tools And Equipment
- Mixing bottles: Plastic or glass bottles with dropper tops are ideal while mixing as well as for storing your e-liquid.
- Syringes or pipettes: These are essential for accurately measuring ingredients.
- Gloves: You will need gloves to protect your skin, especially when handling nicotine.
- Scales or measuring cups: Use these for precise measurements of PG, VG, and other components.
- Labels: Labels will help you to keep track of your flavour combinations and nicotine levels.
The Basic Steps Of Mixing E-Liquids
Now that you have the proper ingredients, tools, and equipment for mixing your own e-liquids, you can move on to the actual steps for mixing e-liquids.
Step 1: Understand Ratios
The PG/VG ratio of your e-liquid will affect your vaping experience significantly. For example:
- 50/50: A balanced ratio suitable for most devices and flavour profiles.
- 70/30 (VG/PG):A common choice among cloud chasers and those seeking a smooth inhale.
- 70/30 (PG/VG): Ideal for flavour intensity and a stronger throat hit.
Your choice will depend on your vaping style (mouth-to-lung or direct-to-lung) and flavour preferences.
Step 2: Calculate Your Nicotine Strength
Nicotine strength is measured in milligrams per millilitre (mg/ml). To achieve your desired level, you will need to calculate the amount of nicotine to add based on the total e-liquid volume. Online calculators or apps can simplify this process.
Step 3: Choose Flavours
It is a good idea to start with simple single-note flavours before advancing to more complex mixes. A good rule of thumb is to use 5-15% flavouring, although this may vary based on the concentrate’s potency and your taste preferences.
Step 4: Mix the Ingredients
- Start with the nicotine base (if you are using nicotine), then add your chosen flavours.
- Measure and add the PG and VG according to your desired ratio.
- Mix thoroughly by shaking the bottle or using a stirrer.
Step 5: Steep Your E-Liquid
Steeping allows the flavours to blend and mature, enhancing the overall taste. Store your e-liquid in a cool, dark place for 1-2 weeks, shaking it periodically. Some flavours may need less steeping time, while dessert or tobacco flavours benefit from longer maturation.
Tips For Success
If you are just getting started in the DIY e-liquid game, consider the following tips to make your journey a little smoother:
- Start small: Start with small test batches to avoid wasting ingredients if a mix does not turn out as expected. A 10 ml bottle is a good starting point for experimentation.
- Document your recipes: Write down every measurement and step when creating your batches. This makes it easier to recreate successful blends and tweak those that need improvement.
- Experiment gradually: When experimenting with flavours, adjust them in small increments to avoid overpowering the mix. A drop or two can make a significant difference.
- Clean your equipment thoroughly: Wash your bottles, syringes, and other tools after each use to prevent cross-contamination of flavours.
Remember To Follow Safety Precautions
While crafting DIY e-liquids are fun and rewarding, safety should always be your priority:
- Handle nicotine carefully: Nicotine is a potent substance. Wear gloves, and store it in a secure, childproof container.
- Use food-grade ingredients: Ensure all components are of high quality and designed for vaping.
- Label your bottles clearly: Indicate your e-liquid’s nicotine strength, flavour, and the date it was mixed to avoid any confusion.
By starting with simple recipes and gradually refining your technique, you’ll gain a deeper appreciation for the art and science behind vaping. As you gain confidence, you can experiment with advanced techniques like creating custom flavour blends, using sweeteners or enhancers, and exploring temperature-controlled vaping for a more tailored experience. Some enthusiasts even venture into creating their own flavour concentrates for a fully DIY approach.
Whether you are looking to save money, experiment with bold new flavours, or enjoy the satisfaction of a handmade product, DIY e-liquids open the door to a more customised and enjoyable vaping experience. So gather your ingredients, follow the steps, and start mixing – it is time to create your perfect vape!
-
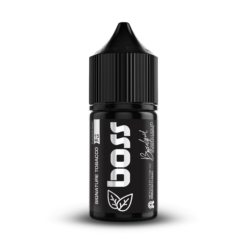
 Boss E-Liquids – Signature Tobacco – Longfill Flavour Shot (15ml)Starting From: R135.00
 -
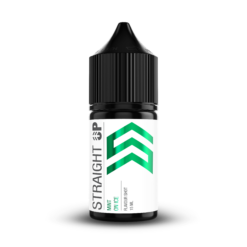
 Straight Up On Ice – Mint – Longfill Flavour Shot (15ml)Starting From: R135.00
 -
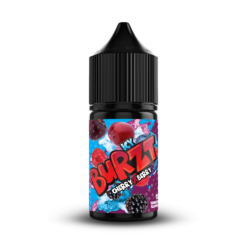
 BURZT – Cherry Berry Ice – Longfill Flavour Shot (15ml)Starting From: R135.00
 -
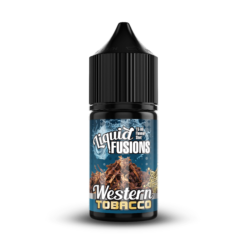
 Liquid Fusions – Western Tobacco – Longfill Flavour Shot (15ml)Starting From: R135.00


